• Skip to main content
  • Skip to primary sidebar
  • Skip to footer

Nashville Wraps StoreNashville Wraps Blog

Creative Gift Wrapping Ideas & Inspiration

  • Blog Topics
    • How Tos
    • Featured Customers
    • Retail Business
      • Offering a Gift Wrapping Service
      • Custom Printed Packaging
      • Gift Basket Tips
      • gift & gourmet business
      • Social Media
      • Economy
      • Marketing Tips
      • Packaging
    • trends
    • Weddings
    • Eco-News
      • eco-friendly packaging
      • recycled plastic bags
      • recycling
      • sustainability
    • USA
    • Robby’s Notes
  • How-To Videos
  • FREE Tools
    • Printables
    • Cello Bag Sizer
  • Shop Now
    • Shop All Products
    • Closeouts
    • Specials
  • Shopping CartShopping Cart

March 6, 2020 By Priscilla Medders Leave a Comment

6 Steps to Build a Better Gift Basket

Share121
Tweet
Share
Pin1
Email
122 Shares
Gift Basket Containers from Nashville Wraps

When it comes to making gift baskets, Nashville Wraps has all the packaging supplies you need. We’ve also got the know-how to put it all together. Read on to learn how easy it is to create gorgeous Gift Baskets!

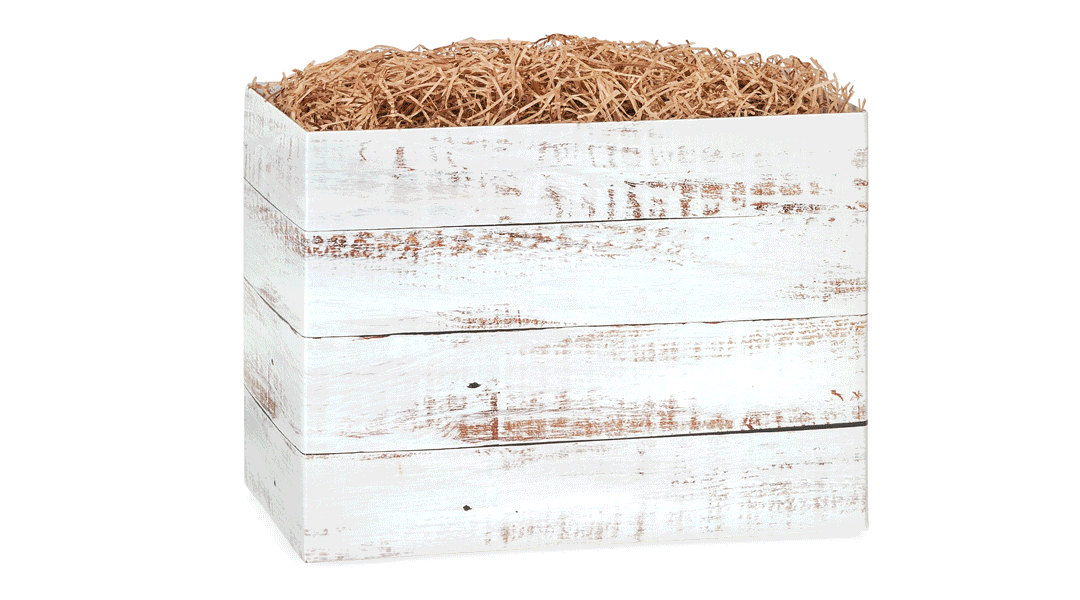
Step 1: Choose Your Gift Basket Container

Shown above are just a few of our favorite Gift Basket Containers. Nashville Wraps carries literally hundreds of different containers to choose from for building your gift baskets. From colorful Basket Boxes to real Wooden Crates, there’s something for every occasion.

Gift Basket Containers from Nashville Wraps

Step 2: Add Volume to Your Gift Basket

Next you want to raise the inside of your basket to display the contents to the best advantage. You can use crumpled up kraft paper in the bottom of your baskets, or one of our handy Basket Benches.

Step 3: Add Basket Shred

Once you have a surface to build on, add some colorful Basket Shred to cushion your products.

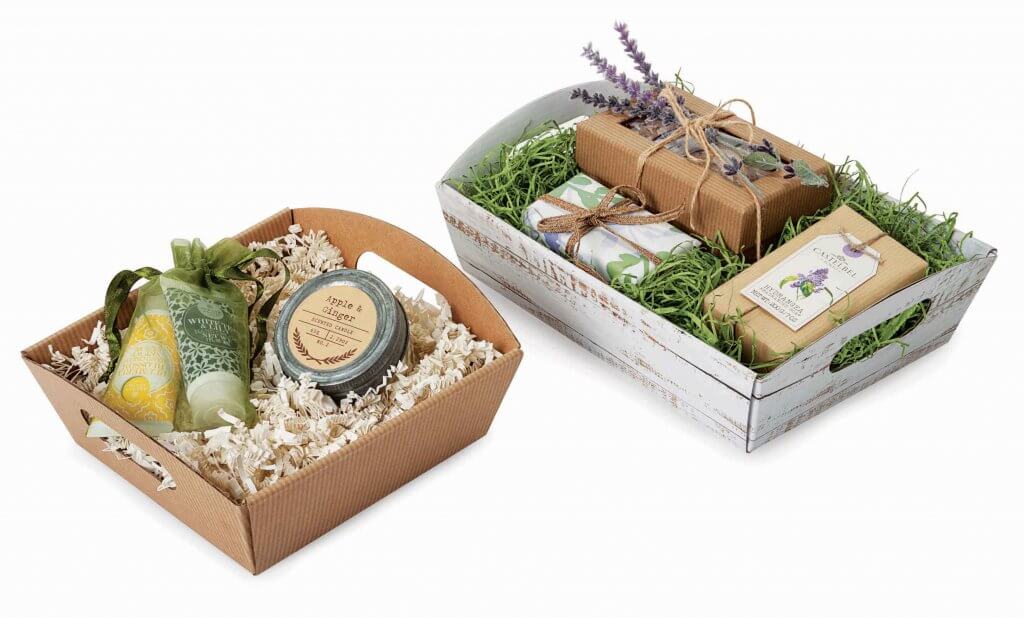
Step 4: Assemble the Products in Your Gift Basket

Now for the fun part: Start building your basket presentation, starting with taller items in the back. Tuck small treats and gifts into Favor Packaging like small boxes or organza bags.

Finish your Gift Basket Presentation with Cello and a Pull Bow

Step 5: Secure Everything in Your Gift Basket

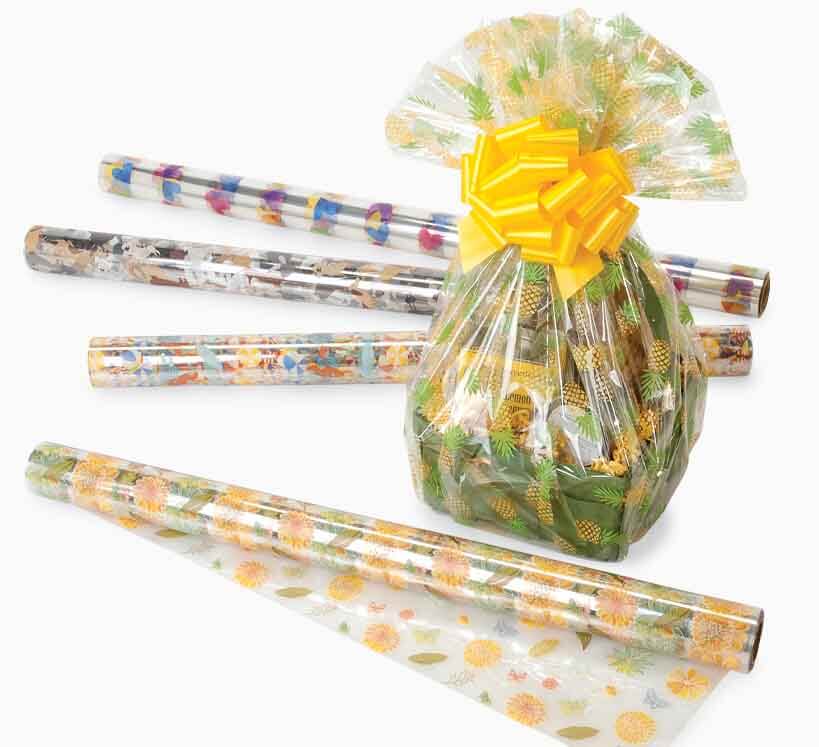
Once you’re happy with the arrangement of your products, add a little more shred for cushioning between items. If you need to, add some Glue Dots to keep items in place. Then wrap it all with a Cello Basket Bag, a Clear Cello Roll, or Shrink Wrap to protect your creation.

Step 6: Top Your Gift Basket with a Bow

This is my favorite step! Choose a showy Pull Bow (see how easy they are to use in the video below) or make your own amazing bow creation using some of our beautiful Tulle or Wired Ribbon. Shop all of our bow-making supplies here.

You’ll find plenty more how-to videos to show you how to tie bows and so much more here on our blog!

Priscilla Medders

Priscilla Medders is a graphic designer who lives in Nashville. She enjoys singing and playing music with her husband, Cheyenne Medders. In addition to contributing to the Nashville Wraps Blog, she also blogs about wellness and studies homeopathy.

More Posts - Website

Share121
Tweet
Share
Pin1
Email
122 Shares

Filed Under: gift & gourmet business, Gift Basket Tips, How Tos, How-to Videos, Packaging

Reader Interactions

Leave a Reply Cancel reply

Your email address will not be published. Required fields are marked *

Primary Sidebar

Get the Catalog

Get a Free Nashville Wraps Catalog

Search

Subscribe

Questions about our products?

Call Customer Care!
8 AM - 5 PM CST
800-547-9727

Blog topics

Footer

Be Sociable

  • Facebook
  • Instagram
  • LinkedIn
  • Pinterest
  • Twitter
  • YouTube

Copyright © 2023 NASHVILLE WRAPS. ALL RIGHTS RESERVED.
PRIVACY POLICY | TERMS OF USE
Log in