

Part 1: Basket Boxes with Plumes and Benches
As holidays come into focus, it’s time to think about gift basket designs, styles and all the detail trimmings.

One of the best areas to focus on details is in the final gift presentation – the outer wrap. Knowing that height adds perceived value to gift baskets, take advantage of the fact, and give baskets a boost using two tricks: box benches and cellophane plumes.
These two tricks can be used together to add more than a foot – yes a full 12-inches. Each inch of added height adds a dollar or more to the perceived value of the gift. Add 12 inches, and you could add $10 – $15 to the price tag. With those kinds of dollars at stake, it is worth your time to look a little harder at the details that add more dollars to your bottom line.
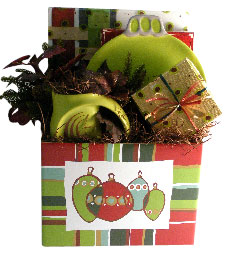
Detail 1: Basket Box Benches
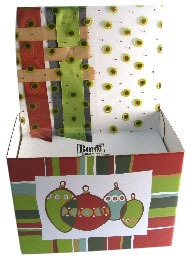

Benches help designers create beautiful, balanced designs, shaped to perfection — and without a lot of messy adhesives and picks that can damage components. Recipients are impressed with the professional appearance of the gift design, even after all the items have been removed. Using a box bench may be a small design detail, but putting it to work for you will save time, help you achieve better profits, and put a professional polish on your design mechanics.
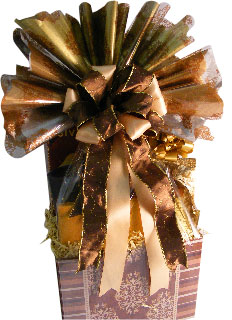

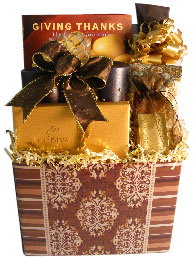
Beautiful plumes tied to the neck of a cellophane overwrap pull the eye upward, elevating the perception of value. Made with patterned cellophane and tissue paper, the plumes cost pennies but add dollars. With practice, the plumes can be made as fast, or faster than a multi-loop bow. Put a layered ribbon bow at the base of a plume and the effect is dramatic. It takes a bit longer to wrap the basket when you add layered plumes, but the final effects can be well worth the labor time.

Most popular among plume makers is the simple gathered triangle technique. Three squares of cello are folded into separate triangles. Each one is gathered, as they are assembled in a trio, then tied to the neck of a wrapped basket. By pulling apart the layers, a fluffy plume with dozens of neat spiked tips soon develops. More complex but also more elegant, triangles of cello and tissue can be folded (like simple forms of napkin folding) to create impressive plumes with soft or creased folds and multiple planes of tips.
Start planning your detailed designs for the holidays, beginning with practice rounds of making plumes, and designing with box benches. With a great base and a fabulous top, all you will need are great components for the interior!
For more information on how to make Gift Baskets see Gift Basket Supplies at Nashville Wraps
See Debra Paulk’s How-to video on making cello plumes here:


