
Originally Published: September 30, 2011, Last Updated: February 6, 2025
Let’s transform regular tissue paper into beautiful blooms with this simple craft! Perfect for topping off a package, storefront decorations, or just brightening up your displays – learning to make tissue flowers is easier than you’d think. This complete guide walks you through every fold and fluff, including clear step-by-step instructions and a video tutorial to create tissue paper flowers that turn out picture-perfect!
Steps to Easy Tissue Flowers
In just three simple steps, you’ll learn how to:
- Stack and fold your tissue paper layers
- Trim your petal shape & secure it for easy hanging/mounting
- Fluff it into a gorgeous bloom (that looks surprisingly realistic!)
Whether you’re crafting a single statement flower for the top of a package or planning to make dozens for a trade show display, these easy tissue paper flowers are a budget-friendly way to add color and charm to any event!
Materials You’ll Need:
- Tissue Paper
- Floral wire, twist ties, string, ribbon, or stapler + staples
- Scissors
- Ruler or measuring tape
Step 1: Stack & Fold Your Sheets
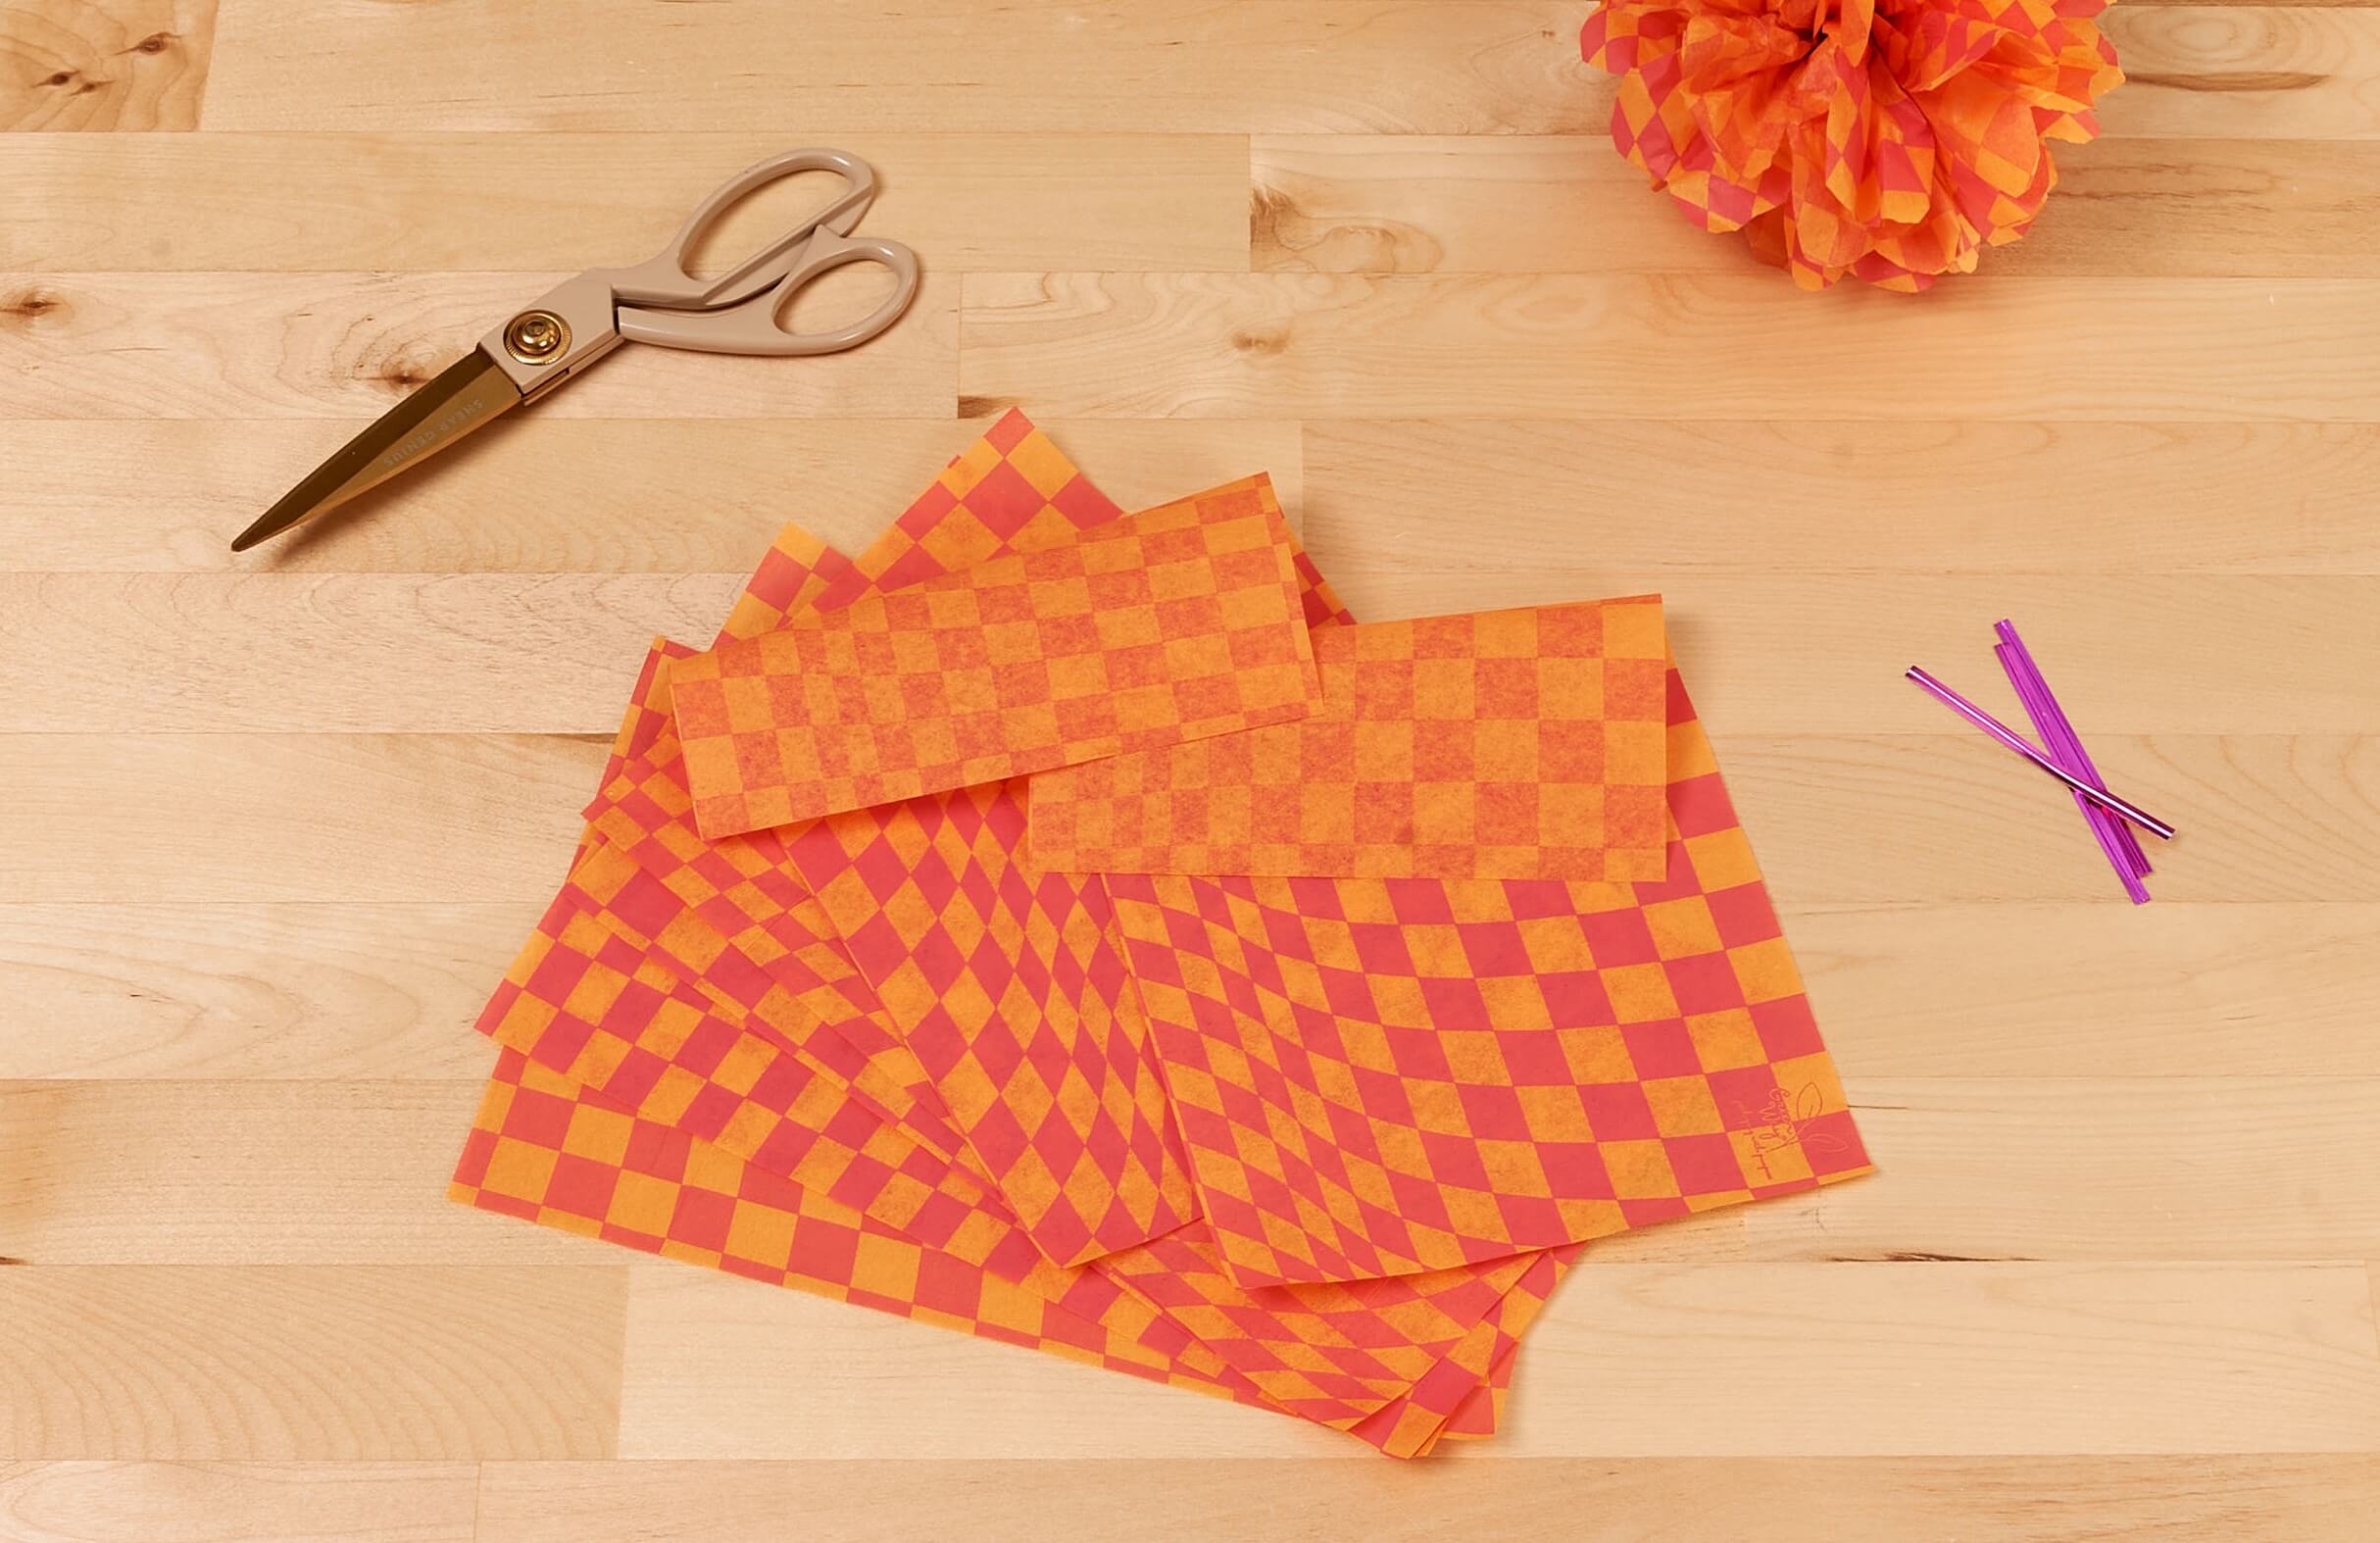
Image Description: Your stacked and folded tissue sheets should form a rectangle accordion.
First, decide how large you want your tissue paper flower to be. This will determine how many sheets you need to layer together! The larger the flower, the more layers you will need to make the end product look fluffy and full.

Crafter’s Note:
*sheet size = number of layers = flower size*
18 x 16in. Sheets = 10+ Layers = ~16in. Flower
15 x 13in. Sheets = 8+ Layers = ~15in. Flower
12 x 10in. Sheets = 6+ Layers = ~10in. Flower
10 x 8 in. Sheets = 5+ Layers = ~8 in. Flower
Then, stack your layers neatly in front of you. (If using larger sheets folded to a certain side, make sure all your folds are stacked along one edge.)
Crafter’s Note: Try stacking multiple colors of tissue for an ombre look, patterned tissue for more variety, or a combination of the two!
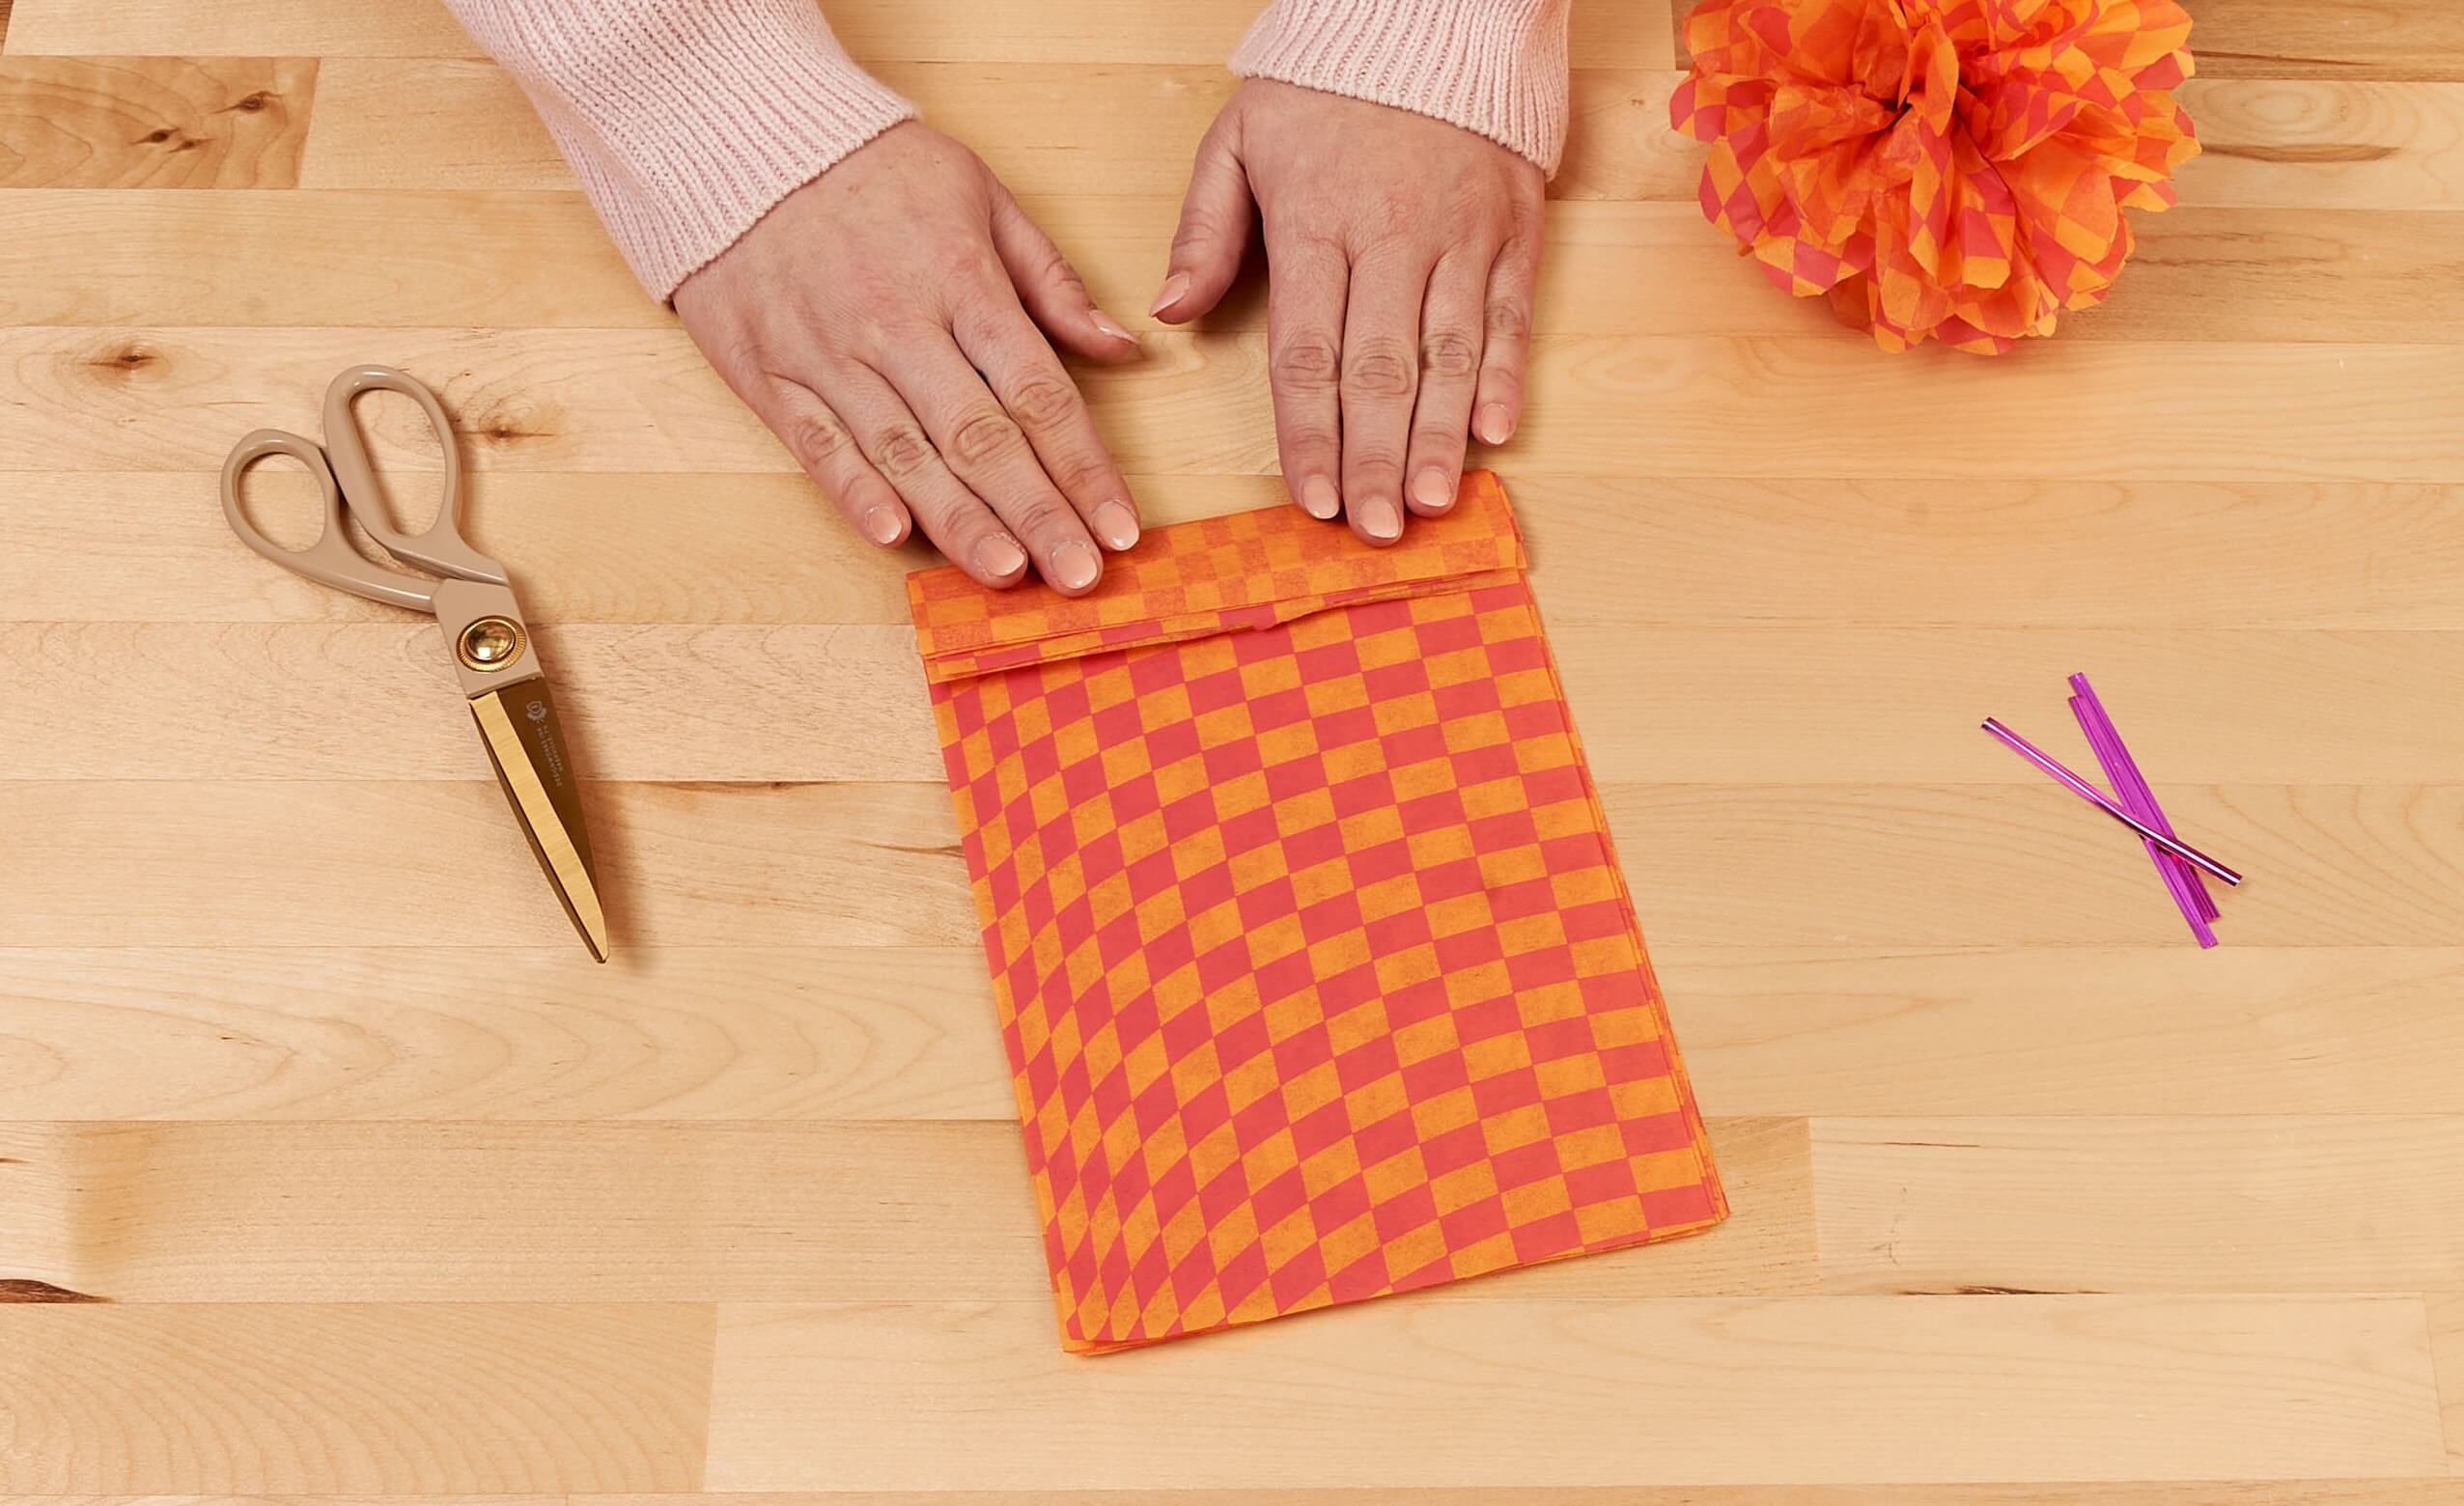
Now accordion-fold back and forth in 1 to 2 inch increments, until you’ve folded the entire length of tissue paper. Larger tissue paper flowers will need a 2-inch width fold, while smaller tissue paper flowers can be folded into 1-inch increments.
Step 2: Notch, Trim, & Tie

Image Description: Notch both sides of the center.
Now that your sheets are folded into an accordion, trim a notch on either side in the center of your bundle.
This notch will be where we secure the middle of the flower to hold it all together. Notching makes our flower less bulky in the center, so it will appear more fluffy once it’s finished.
Then, trim the ends of your accordion to create the petals of your flower.
We have demonstrated three different edge variations, and how they’ll look once you fluff your flower. Feel free to leave your edge straight, or come up with your own style!
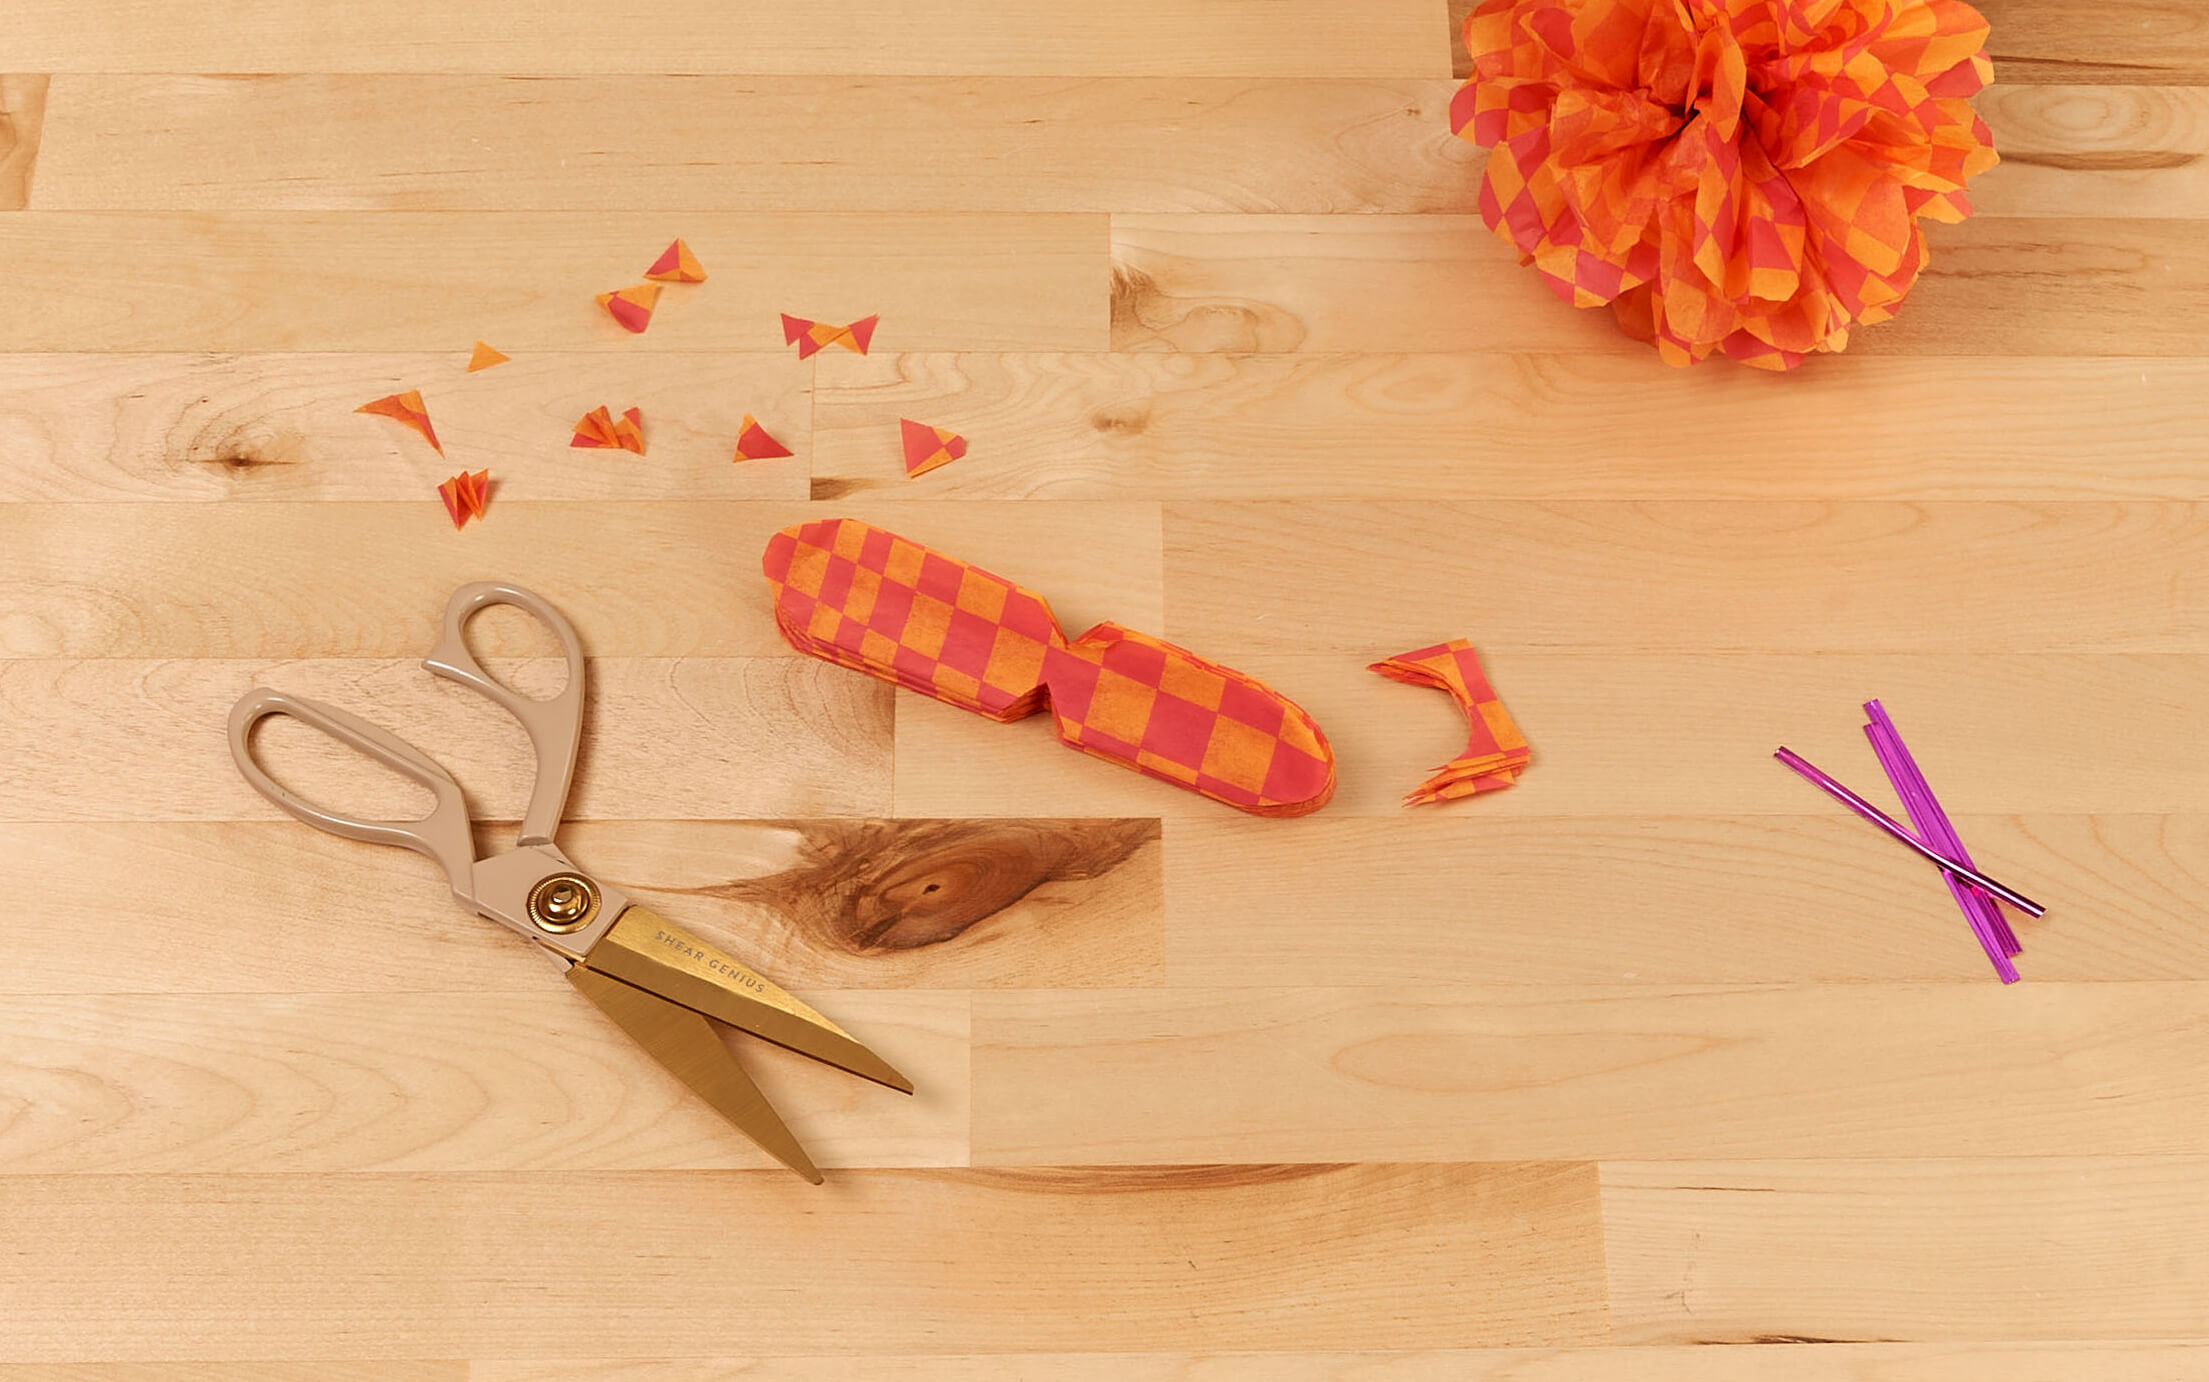

Image Description: Select your petal shape, then trim both ends into the desired petal shape.
Crafter’s Note: Cut rounded ends to create a carnation or peony, or try pointed ends for a mix between a dahlia and a chrysanthemum!
It’s time to secure it all together! Tie a floral wire, raffia, ribbon, or clear fishing line tightly in a knot in the center where we just cut the notches.
Make sure this knot is secure – it will be hard to access it once we fluff out the flower petals. Also, be careful not to tie it too tight, or it may rip through the tissue!
Crafter’s Note: If you’re transporting these from home or to an event, keep them flat and fluff on-site! This will keep your tissue paper flowers fluffy and beautiful, and avoid getting crushed in transit.
Step 3: Fluff & Style
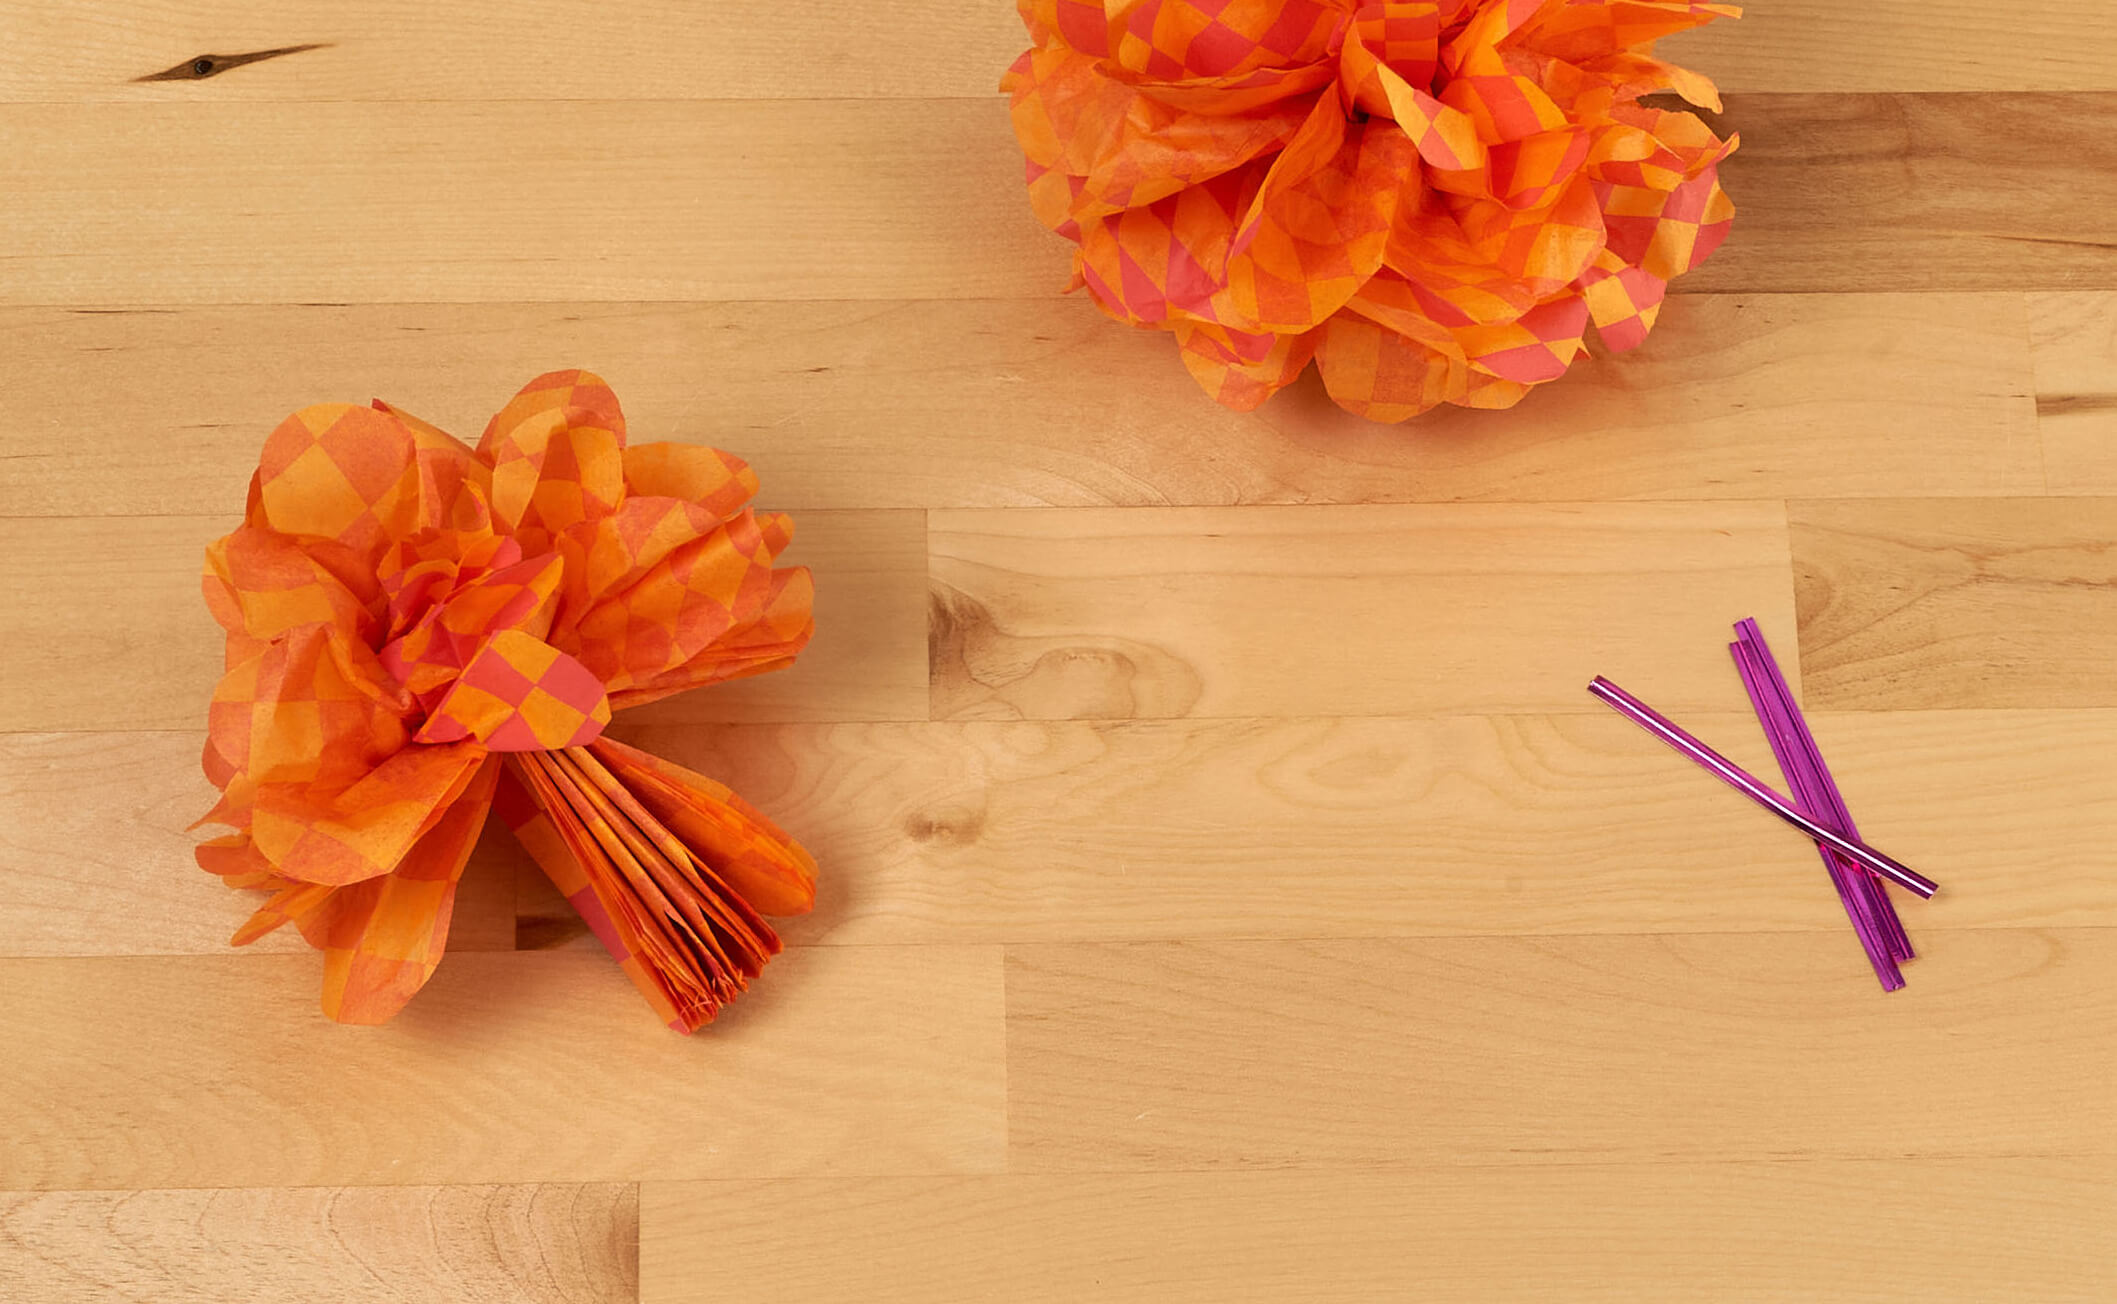
Image Description: Pull up one layer of tissue at a time. Slowly and carefully pull all remaining layers of tissue away from the accordion to create tissue flower petals.
Your tissue paper flower is almost complete! Now we get to fluff up our petals and watch our gorgeous bloom come to life.
One sheet at a time, pull the petal layers away from the center at a 90-degree angle, forming your flower’s petals. Alternate sides until all the layers have been pulled out of the accordion, so you’re left with a fluffy tissue paper flower.
Continue to fluff the tissue paper as needed to fill out the center and hide your knot inside.
And that’s it – enjoy your new tissue paper flower!
Extra Tips for Do it Yourself Tissue Paper Flowers

Trending tissue paper color combos:
- Try corporate colors or custom prints for a fun branded look
- Try rainbow, ombre, or gradient colors to show your creativity
- Try patterned tissue paper for a totally unique look
Patterned tissue paper to make your tissue paper flowers POP:
- Floral
- Geometric
- Striped
- Branded logos
- Textures
Love to see the tutorials like making flowers from tissue paper.
Keep it up
Nice idea!
Thanks for info.
hello,
i am really happy to see the videos. now i have made one flower out of newspaper. i feel satisfied and happy after making it.
now i plan to make it using proper colored tissues..
thanks a lot for the instruction on how to make flowers…
I am proud to be a Nashville Wraps customer, and thank you for your time devoted to educating us & entertaining us.
I especially love to see the tutorials like making flowers from tissue paper. I save/recycle tissue paper, and have for years, to make into my own “handmade paper” art.
Keep up the great work and THANK YOU for supporting Hand Made in America
Made some really cute flowers yesterday after watching this video. My craft booth is going to look so cute! Will post pics. :). Thanks for sharing your knowledge.