


Joanna said that it’s very easy (and economical) to make a diaper cake. They are all the rage right now, so cash in while you can. First, you will want to decide on your style. For this how-to blog, I chose a gender-neutral approach, but you can customize it for the individual. You will need to have the following “ingredients” on hand to begin:
- At least 50 diapers (depending on the size you choose, you may use more or less than I did for this cake)
- Various ribbon for decorating – I chose the flora satin, wired Satin Edge Organza, Curling Ribbon, and a few of our White pre-tied Organza Bows to finish.
- Some sort of base for the cakes – I chose White Matte Nested Boxes – I like to use nested boxes for the base because they add value to the diaper cake. The new mom can reuse them to store baby mementos and other things after the diapers have been used.
- Glue dots, double stick tape or hot glue gun — I used the High Tack Glue Dots and Double Coated Tape – I prefer glue dots and tape over hot glue for this project because they both peel off the diapers easily.
- Baby items to decorate the cake – anything works, but for this cake, I got some inexpensive items like a rubber ducky, socks, washcloths, pacifiers and teething rings. Again, this is something that will add value to the cake, and can be personalized for the individual customer.
- A cake plate or cake pad to hold the base box
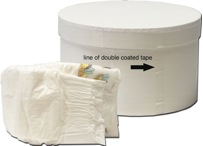

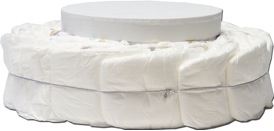

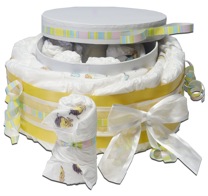

Now fill the boxes with baby items. I filled the top section with diapers rolled up and tied with curling ribbon.
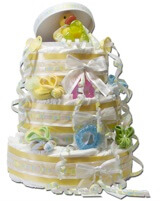
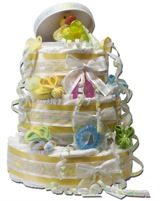
Finally, it’s time to assemble the cake. I like to use glue dots or lines to attach each level to the one below it. Hot glue works well, but again, it doesn’t peel off as easily, so the boxes would not be reusable. Your customer will appreciate the value! Once each layer is secured in place, it’s simply a matter of decorating the cake. Be as creative or simple as you want – or let the customer decide. Create a few designs from which the customer can choose and then customize the ribbon color.
I love the way Joanna’s cake turned out. It would be an adorable centerpiece for a baby shower or a memorable gift. Send us pictures if you make this item – we will put you on our Facebook page. Email them to facebook@nashvillewraps.com be sure to give us your name and store name so we can give you credit.
Kathy Green
Packaging Consultant
Nashville Wraps

