Many of you have asked for more Gift Basket “How To Ideas.” Our new Halloween & Harvest Packaging Page offers a great opportunity to demonstrate the building of a beautiful autumn basket step-by-step.
Select the theme and products that will go in the basket. Price is no object for me because most of my boxes are empty, but you will need to factor in the cost of your contents to price the finished gift basket. Wine & Pasta is my theme and I want to include our new Gourmet Window Boxes. Without just the right container on hand, it’s time to think outside the box!
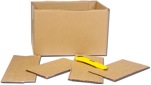
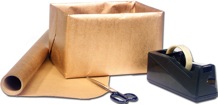
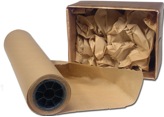
A purchased container isn’t always necessary – get creative – look around – you might be surprised at what you can find. A Nashville Wraps catalog box is transformed with a trusty box cutter and copper kraft gift wrap, (just cut off the top flaps and wrap the box) – lovely!
The items that will fill my basket need some support. Scrunched up pieces of kraft paper stuffed tightly in the bottom of the box do the trick. More kraft paper is added to support the individual items. Notice, Crinkle Cut or Fine Cut Shreds aren’t added until the end. They add color and texture but not support.
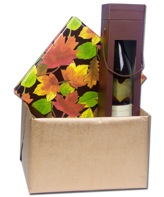
The first item in, a wrapped gift box. It might hold pretty cloth napkins, tea towels or other related items. This box forms the backbone of the gift basket. Wrapped in beautiful Autumn Leaves it’s wedged into the back of the copper box.
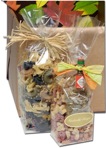
Next, a Window Box, perfect for that bottle of wine! It’s my featured item so I want it to really stand out. With a small ball of kraft paper under it I can raise it up to show above the other items in the box. I’m adding a biodegradable cello bag with colorful pasta and a tiny Tabasco Sauce bottle tied to the top – again using the kraft paper for support. Aren’t the cello bags of pasta cute!
This is a great place for my custom label. Always include your store information with your Gift Basket. Recipients might want to order another!
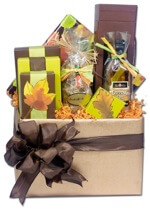
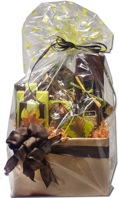
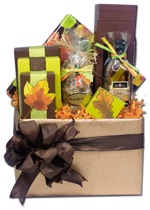
Leaf Green and Chocolate two-piece candy boxes go in next. Chocolate works for any theme! After wrapping each box with Wired Dual Tone Grosgrain ribbon in Chocolate and Kiwi, I cut out a leaf from the Autumn Leaves wrap, run it through a sticker maker and attach it to the smallest box over the ribbon. Another leaf shape went for the little square Truffle Box that I put in the center of the container. The last item in is another cello bag with bottled dipping oil. It’s tied with Recyclable Paper Raffia. Happy with the placement and arrangement of the items, it’s time for finishing touches. Orange Sherbet Crinkle cut paper is tucked into bare spots and to show above the sides of the box. The Chocolate Dual Tone Grosgrain Bow’s dual purposes are to disguise the folds on the sides where I wrapped the box and to add that attractive finishing touch. In the video, you will learn how to use a basket bag to wrap the entire basket keeping the bow to the outside so it is not mashed.
After securing the bag and bow, it is time to work on the top of the basket bag. Add a cello fan (for instructions on making a cello fan see our cello blog) and tie it on with Chocolate Paper Raffia. I think it turned out grand! I hope you will be able to use some of this information to make your gift baskets spectacular!
Kathy works with the Nashville Wraps’ Marketing Team as a packaging consultant and photo stylist. She is also a Master Gardener and enjoys her greenhouse and garden, three spoiled dogs, hubby and grandkids in her spare time. She also loves any kind of craft and spends rainy days in the art studio she shares with her creative husband, Bill.